Hosting Your First Workshop or Event on miingl
Intro
What You’ll Learn in This Article
By the end of this guide, you’ll know how to:
Access an existing miingl event you’ve created
Start your event and prepare your equipment
Understand the host and guest interface
Use core host tools during a live event
End your event safely when finished
Before You Begin
To host an event on miingl, you must:
Have a miingl account (Sign Up)
A current Host Subscription
Have already created an event
Step-by-Step Instructions
1. Sign In to miingl
- Go tohttps://miingl.com
Enter your account credentials to log in
2. Access Your Event
Click My Events
Scroll to find your event
Click on the event tile to open the event details page
3. Verify Event Details
Before starting:
Confirm the date and start time
Review the attendee list to see who is expected
This ensures you’re launching the correct event.
4. Designate a Co-Host (Optional)
If you want another participant to help manage the event:
Locate their name in the attendee list
Click the three dots next to their name
Select Make Co-Host
Co-hosts have access to host controls during the event.
5. Start the Event
When you’re ready:
Click Start Event
Participants are able to join up to 30 minutes before the event start time and until the event end time or the event closes. This allows participants to network and connect before and after the event. If you start the event outside this event join window, the event will become live, and participants will be able to join.

6. Check Your Equipment
Once inside the event:
Test your microphone
Select the correct webcam
Test your speakers
This ensures participants can see and hear you clearly.
7. Take Your Avatar Picture
Take a photo for your avatar
This image is shown when your camera is turned off
Click Start Event
8. Join the Event Early
Participants can join:
Up to 30 minutes before the event start time
- Pro Host Tip: Encourage Participants to Show Up Early to Connect
This allows time for informal networking and connection before the session begins.
Understanding the Host Interface
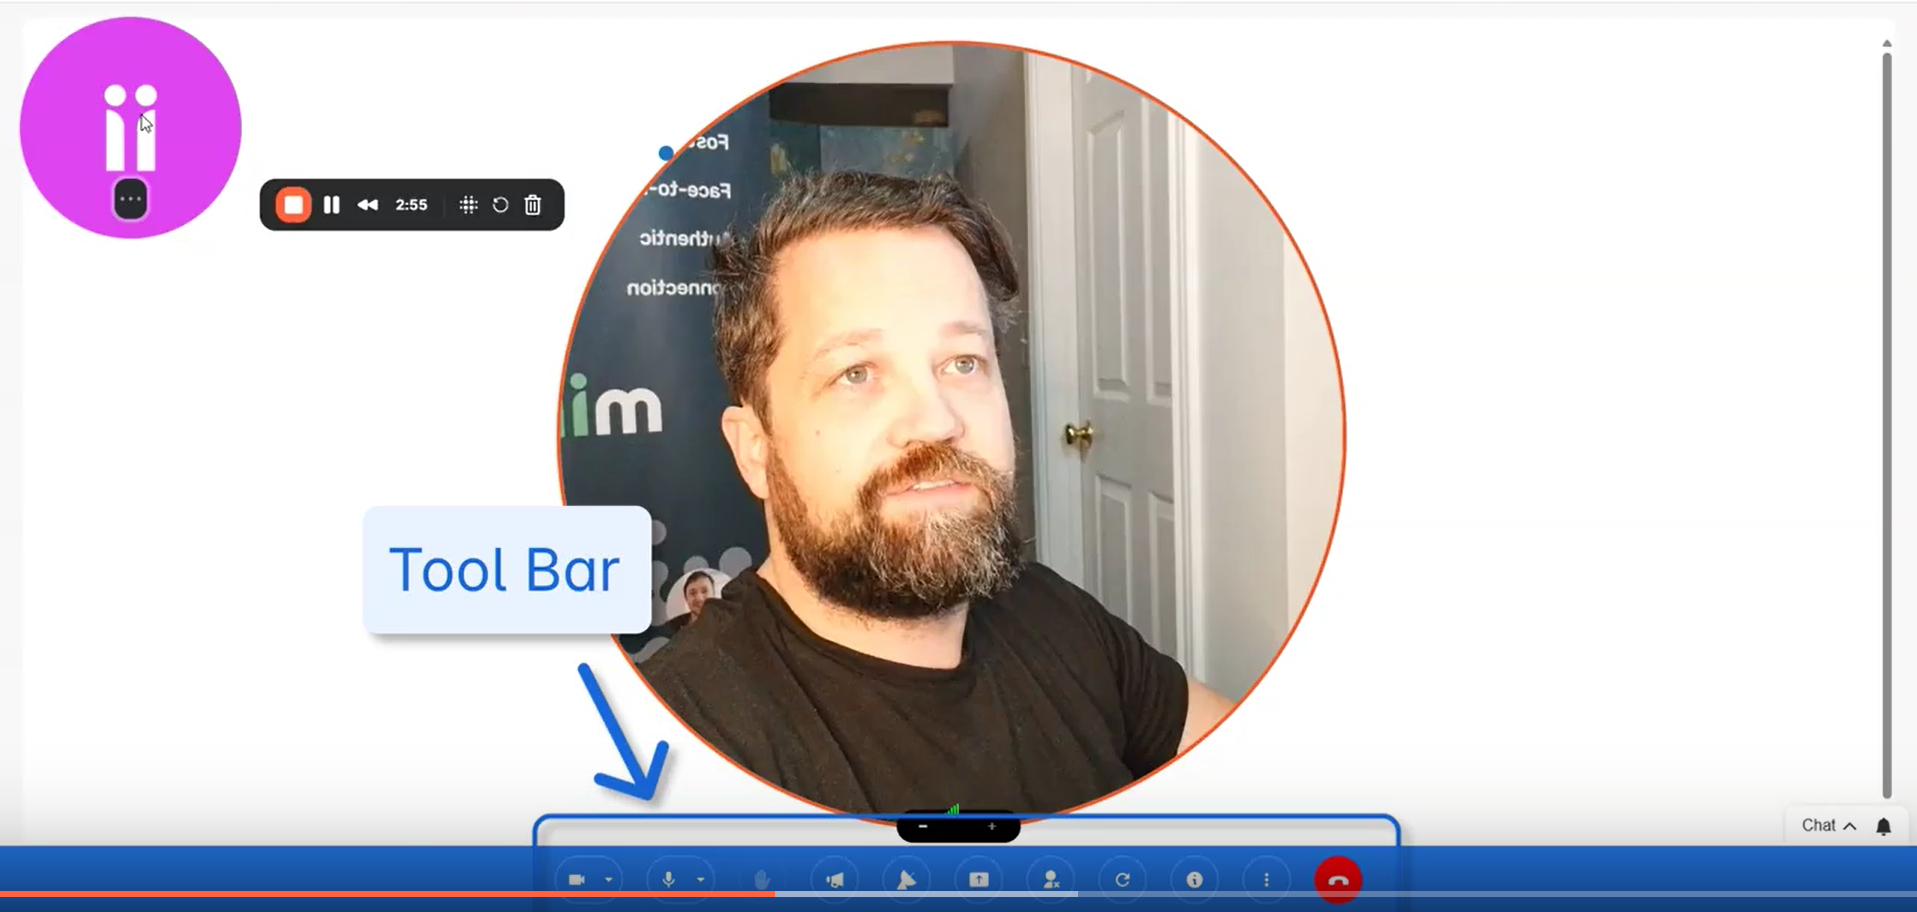
As a host, you have access to additional controls that guests do not.
Guest Controls
Guests can:
Select or turn their camera on or off
Select mic or mute and unmute themselves
Raise their hand (in broadcast mode)
Share their screen in the venue, in clusters, or when on stage in a broadcast
Refresh Venue
Flag the event under the More Menu if the event is inappropriate and needs to be reviewed by the miingl team
Host Announcements
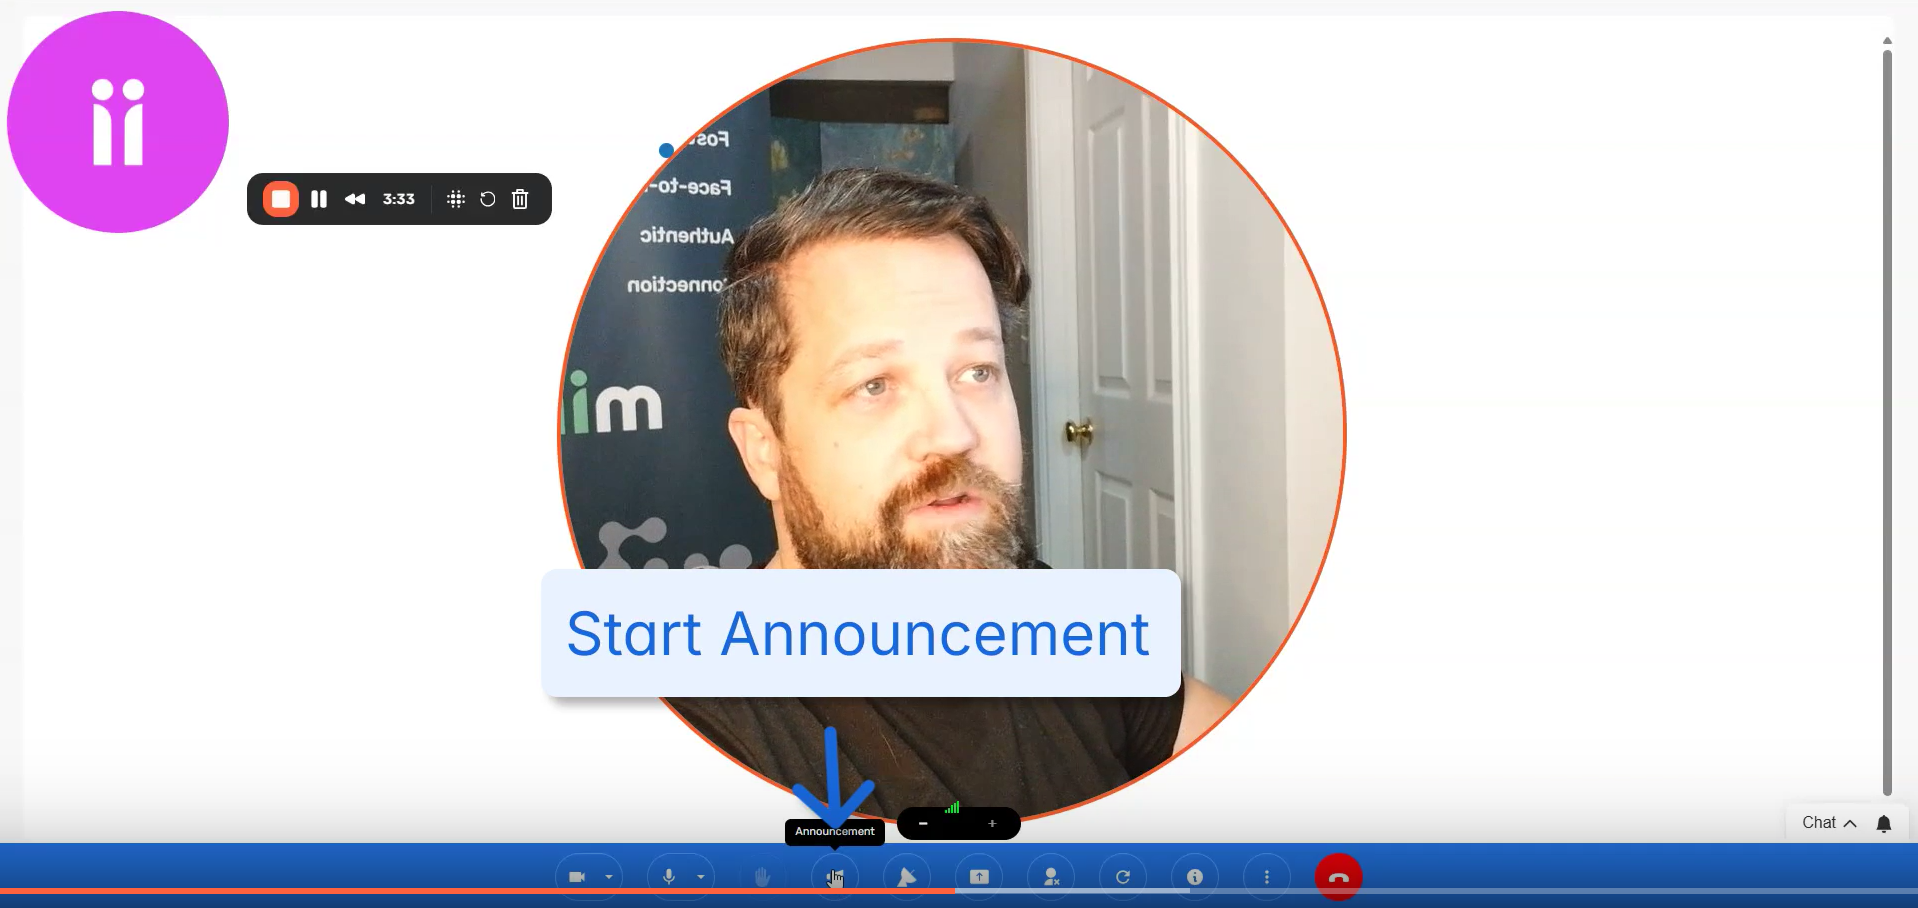
Use the Announcement button to interrupt and address all guests at once
This is useful for sharing instructions or bringing everyone’s attention back.
Broadcast Mode
Only hosts and co-hosts can enable broadcast mode
Broadcast mode allows hosts to present to all attendees simultaneously
Managing User Behavior
Hosts can:
Monitor flagged users
Block users if necessary to maintain a safe environment
Inviting More Guests
You can invite additional participants during the event:
Click Events Detail icon
Click Invite More Users
Enter the guest’s name and either their email address or mobile number
Mark reCAPTCHA I'm not a robot
Click Send Invites
After the invite page or by pressing Skip, a host can get the Join Event URL
Additional Host Functions
Use the More menu to:
Start a broadcast
Make an announcement
Flag the event
Report bugs or issues
Leave the Event
When your session is complete:
Click the Leave Event Icon
Guests may continue their conversations after the host leaves.
Watch the Walkthrough
What’s Next?
To go deeper into hosting effective sessions, explore these related articles:
Related Articles
Cancelling And Deleting An Event On miingl
Before You Start (Prerequisites) To cancel or delete an event, you must: Have a miingl account (Sign Up Here) Be the host or co-host of the event Have an existing miingl event or suite created Only hosts and co-hosts can manage event status. Prefer ...Setting Up Your miingl Workshop or Event Space
Intro This article explains how to set up a workshop or event space on miingl, from creating the event to inviting participants and tracking attendance. What You’ll Learn in This Article By the end of this guide, you’ll know how to: Create a new ...How to Clone an Event on miingl
Cloning an event lets you quickly recreate a past event without starting from scratch. This is especially helpful for recurring workshops, repeated sessions, or events you plan to run again with minor updates. Important to Know Before You Start Only ...Creating A Paid Workshop Or Ticketed Event
Before You Start (Prerequisites) To create a paid workshop or ticketed event on miingl, you’ll need: A miingl account Sign Up Here An Event Host subscription A nouri account Sign up A Stripe account for payment processing Sign Up If you don’t have ...Inviting Speakers, Co-Hosts and Guests to Your miingl Event
Intro This article explains how to invite speakers, guests, and co-hosts to your miingl event, both during event creation and after your event has already been created. What You’ll Learn in This Article By the end of this guide, you’ll know how to: ...